
THE dining room/puzzle (dinpuz?) table
so it all started back in august, when aaron sent me beautiful wood for my birthday. after much consideration, i decided to make a dining room table, something i’d been thinking about for a few years. but this wouldn’t be just any dining room table. this would convert to a puzzle table by pulling some (or all) of the top off, which allows us to eat while we puzzle.
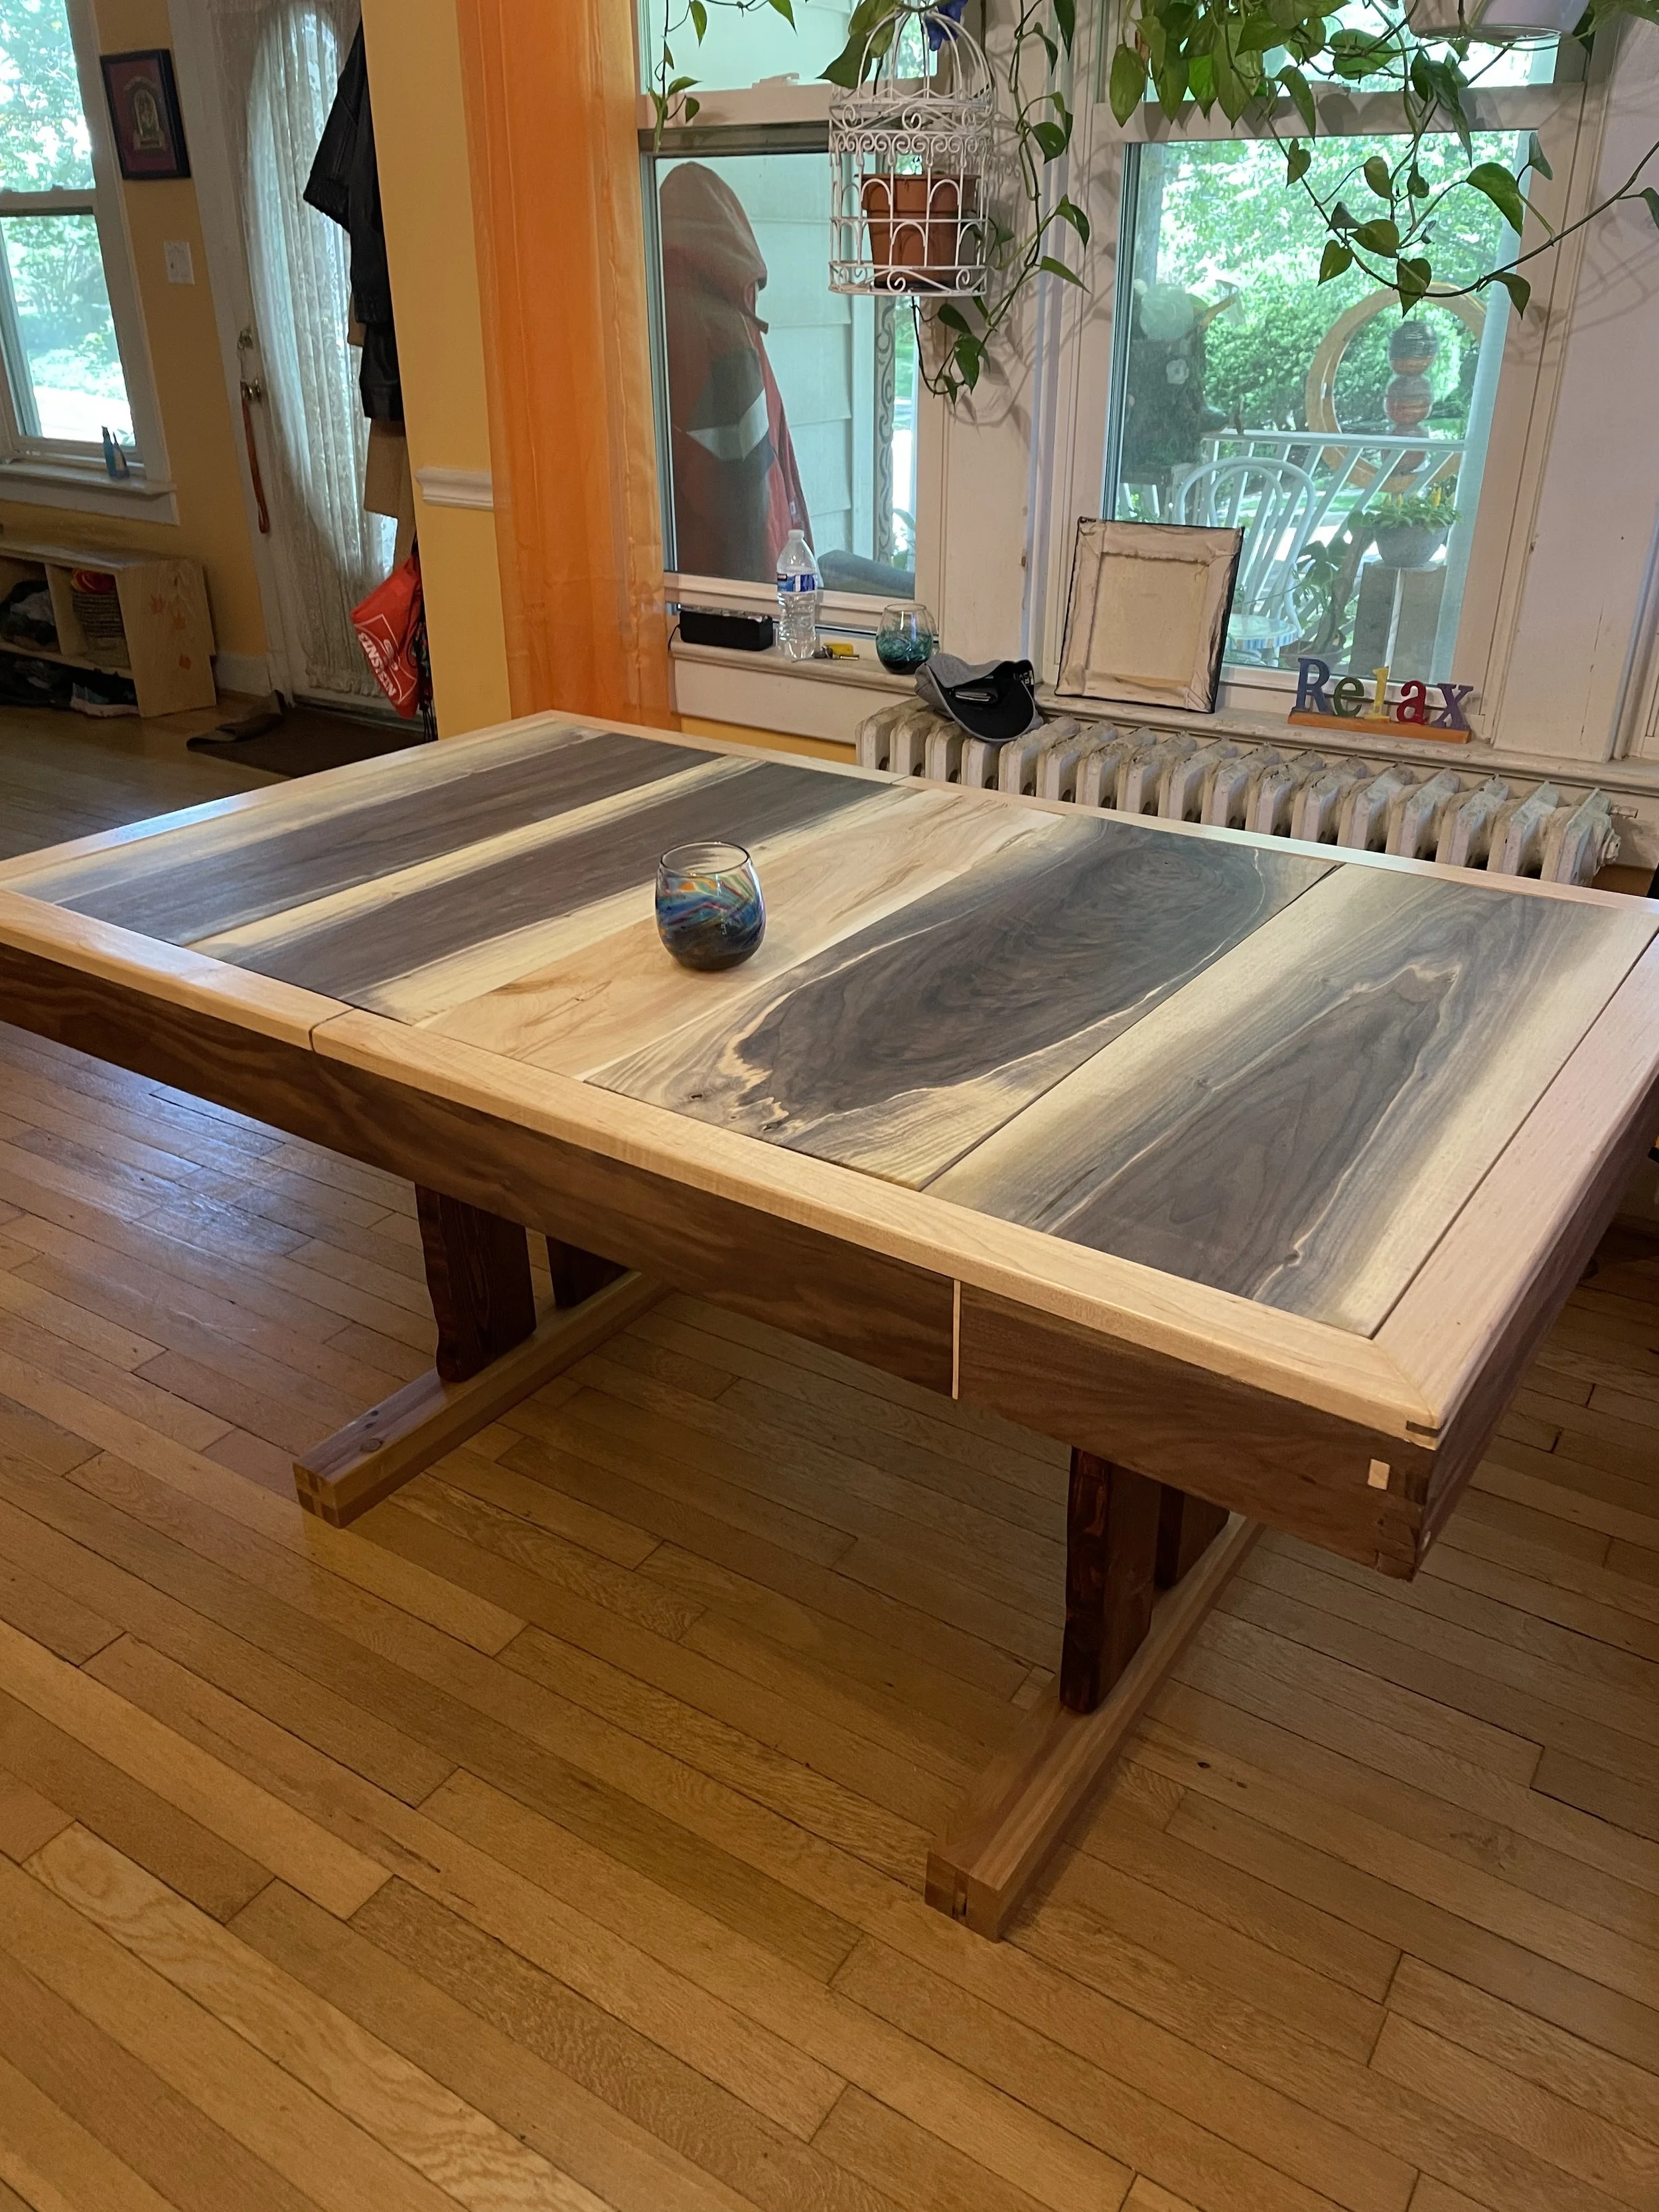
interested in my process? read on. first, the finished table!


neato, right? so yes, this is a picture heavy blog. posted many of the first half pics on social media, before 47 took over, all the billionaires capitulated, and i swore off posting. so the first batch of 48 pics include narrative.
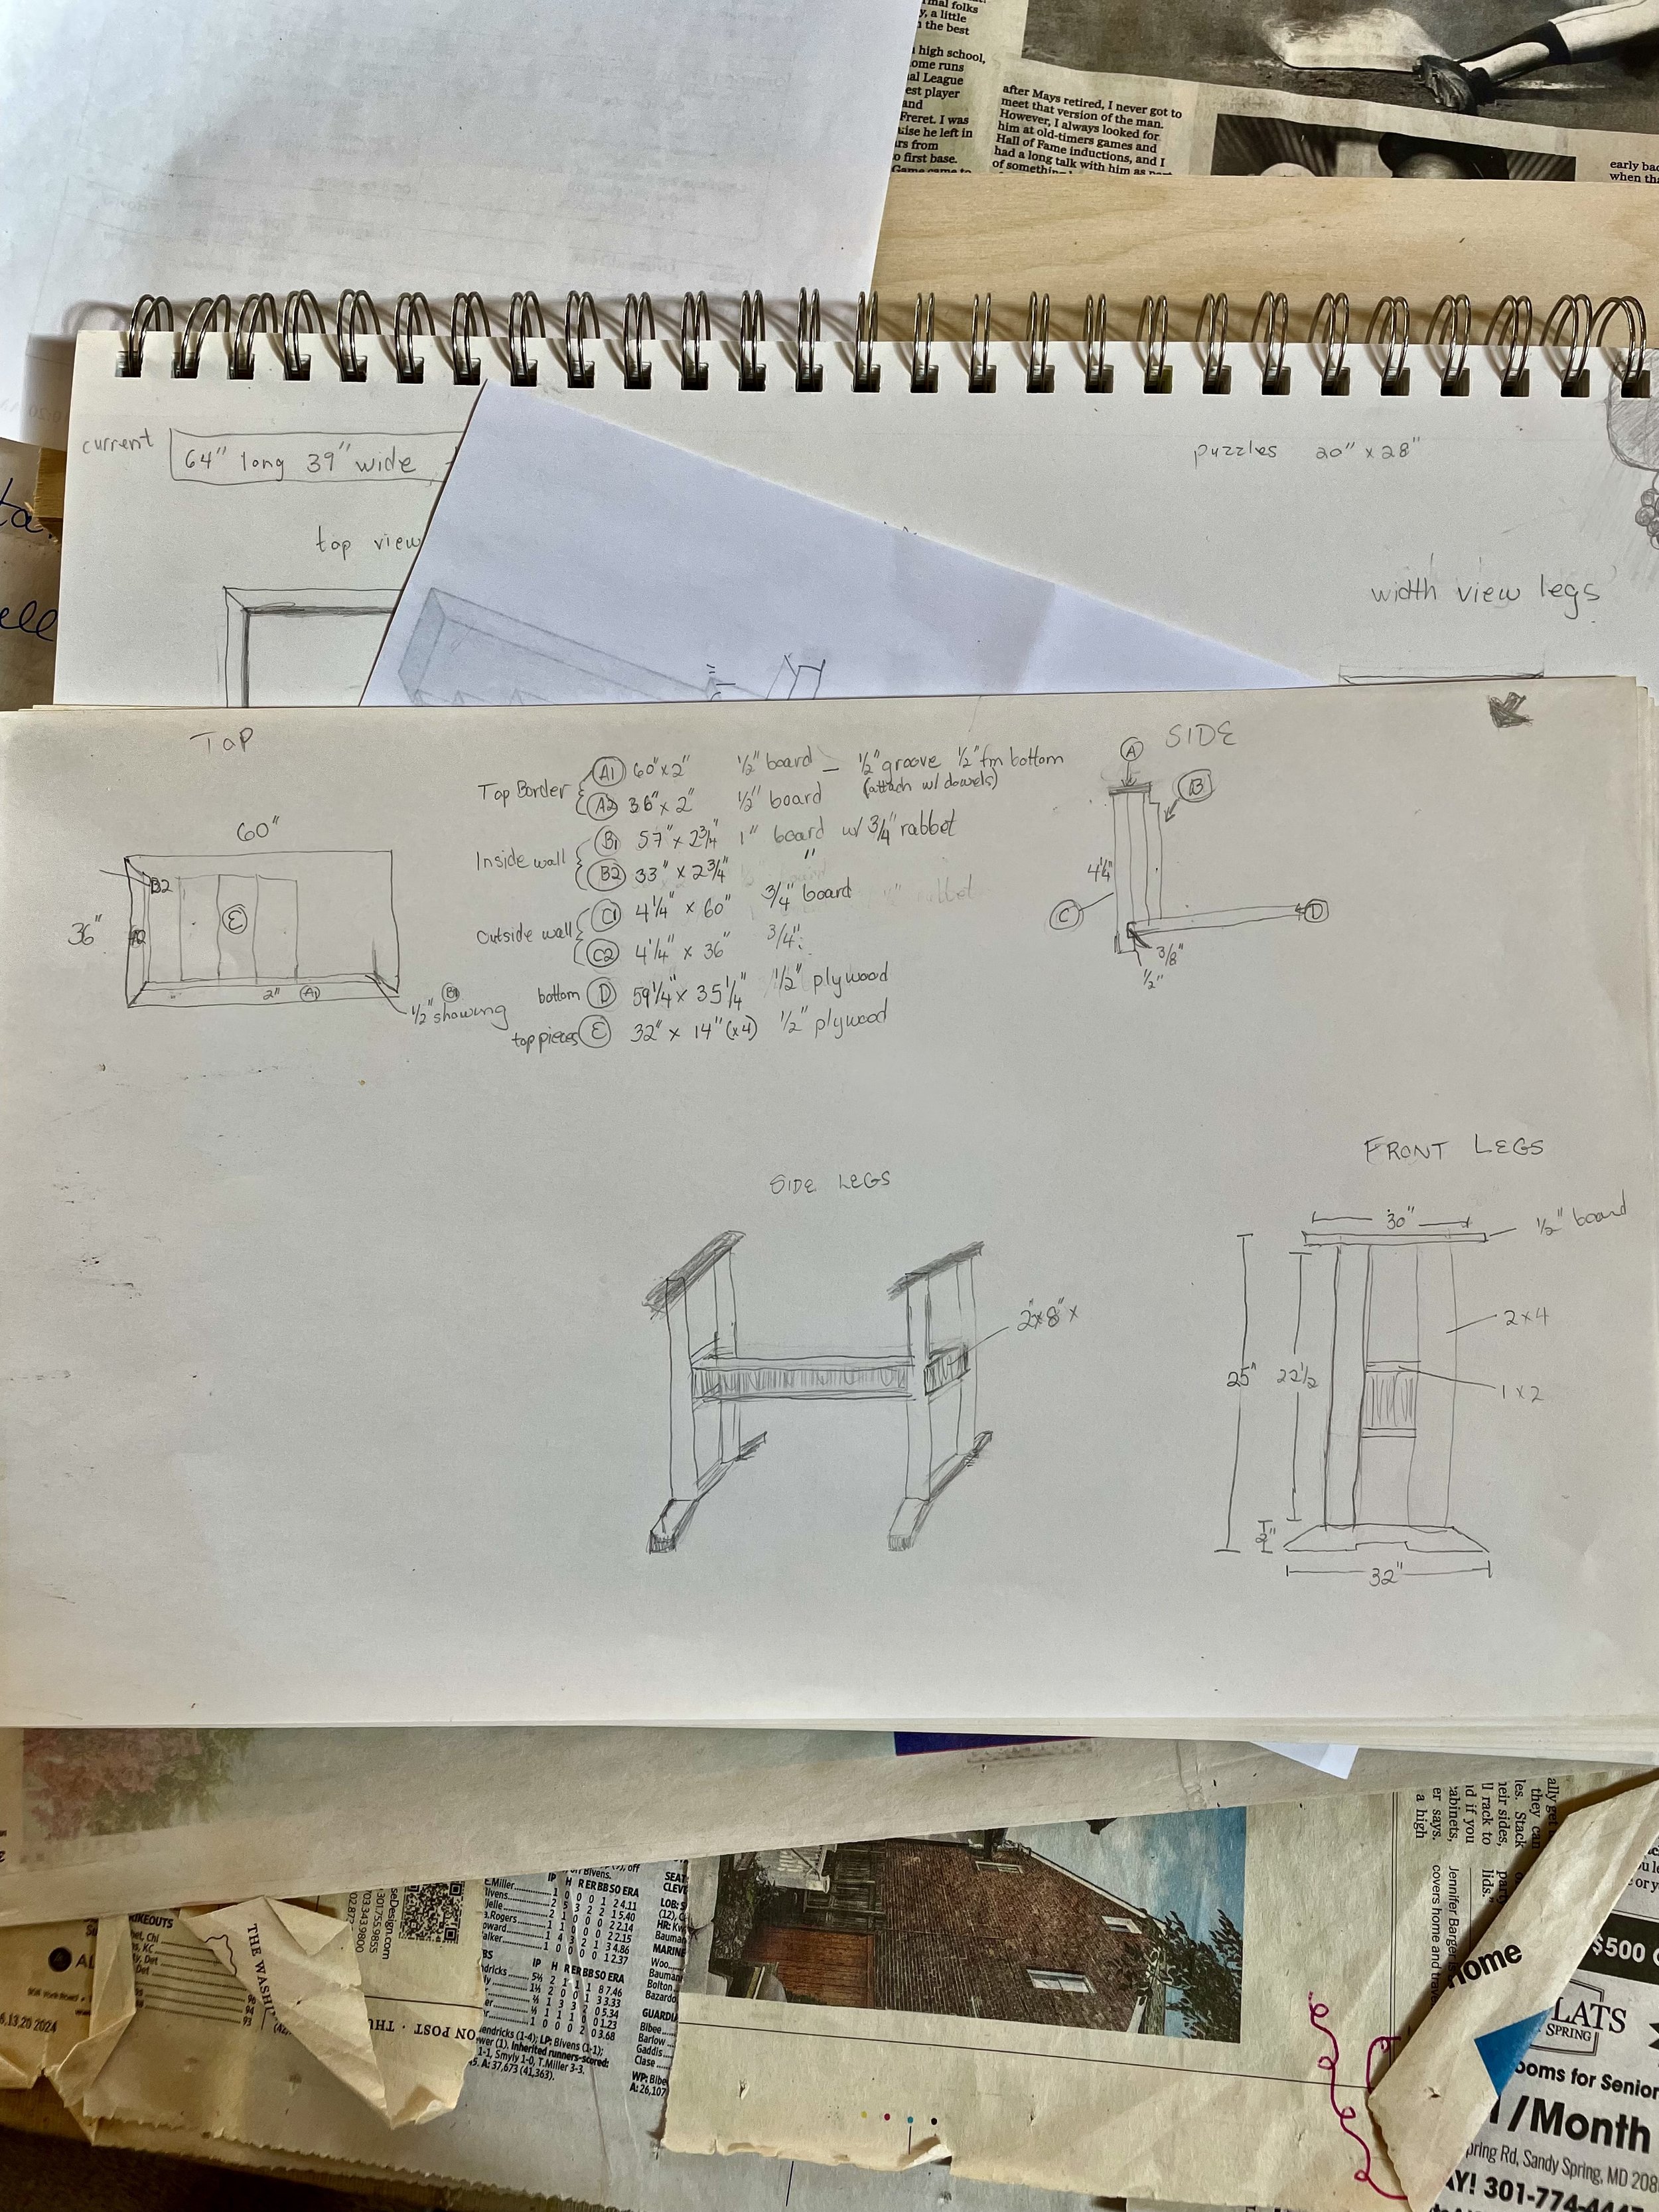


after mid january, there’s a three month break (knee surgeries, mom dying), and then i began again in mid april. cut and glued up some cedar and maple to make bases for the legs. then i mathed it out to come up with the size of the tenons, and lay those out on the base because all the how-tos say to make the mortise before the tenon. i ended up changing the size of the legs so all those previous tenon 2”x 4”s were moved to the scrap pile. using 2”x 6” for the legs, two on each side. enjoyed chiseling out the mortises (dad’s chisel set) which got easier (and better) as i did more of them.


not many pictures of the mortise and tenoning, but you get the idea. finished cutting the legs and a 4”x4” (warped, unfortunately) down to size. see below for the legs without any design elements added.
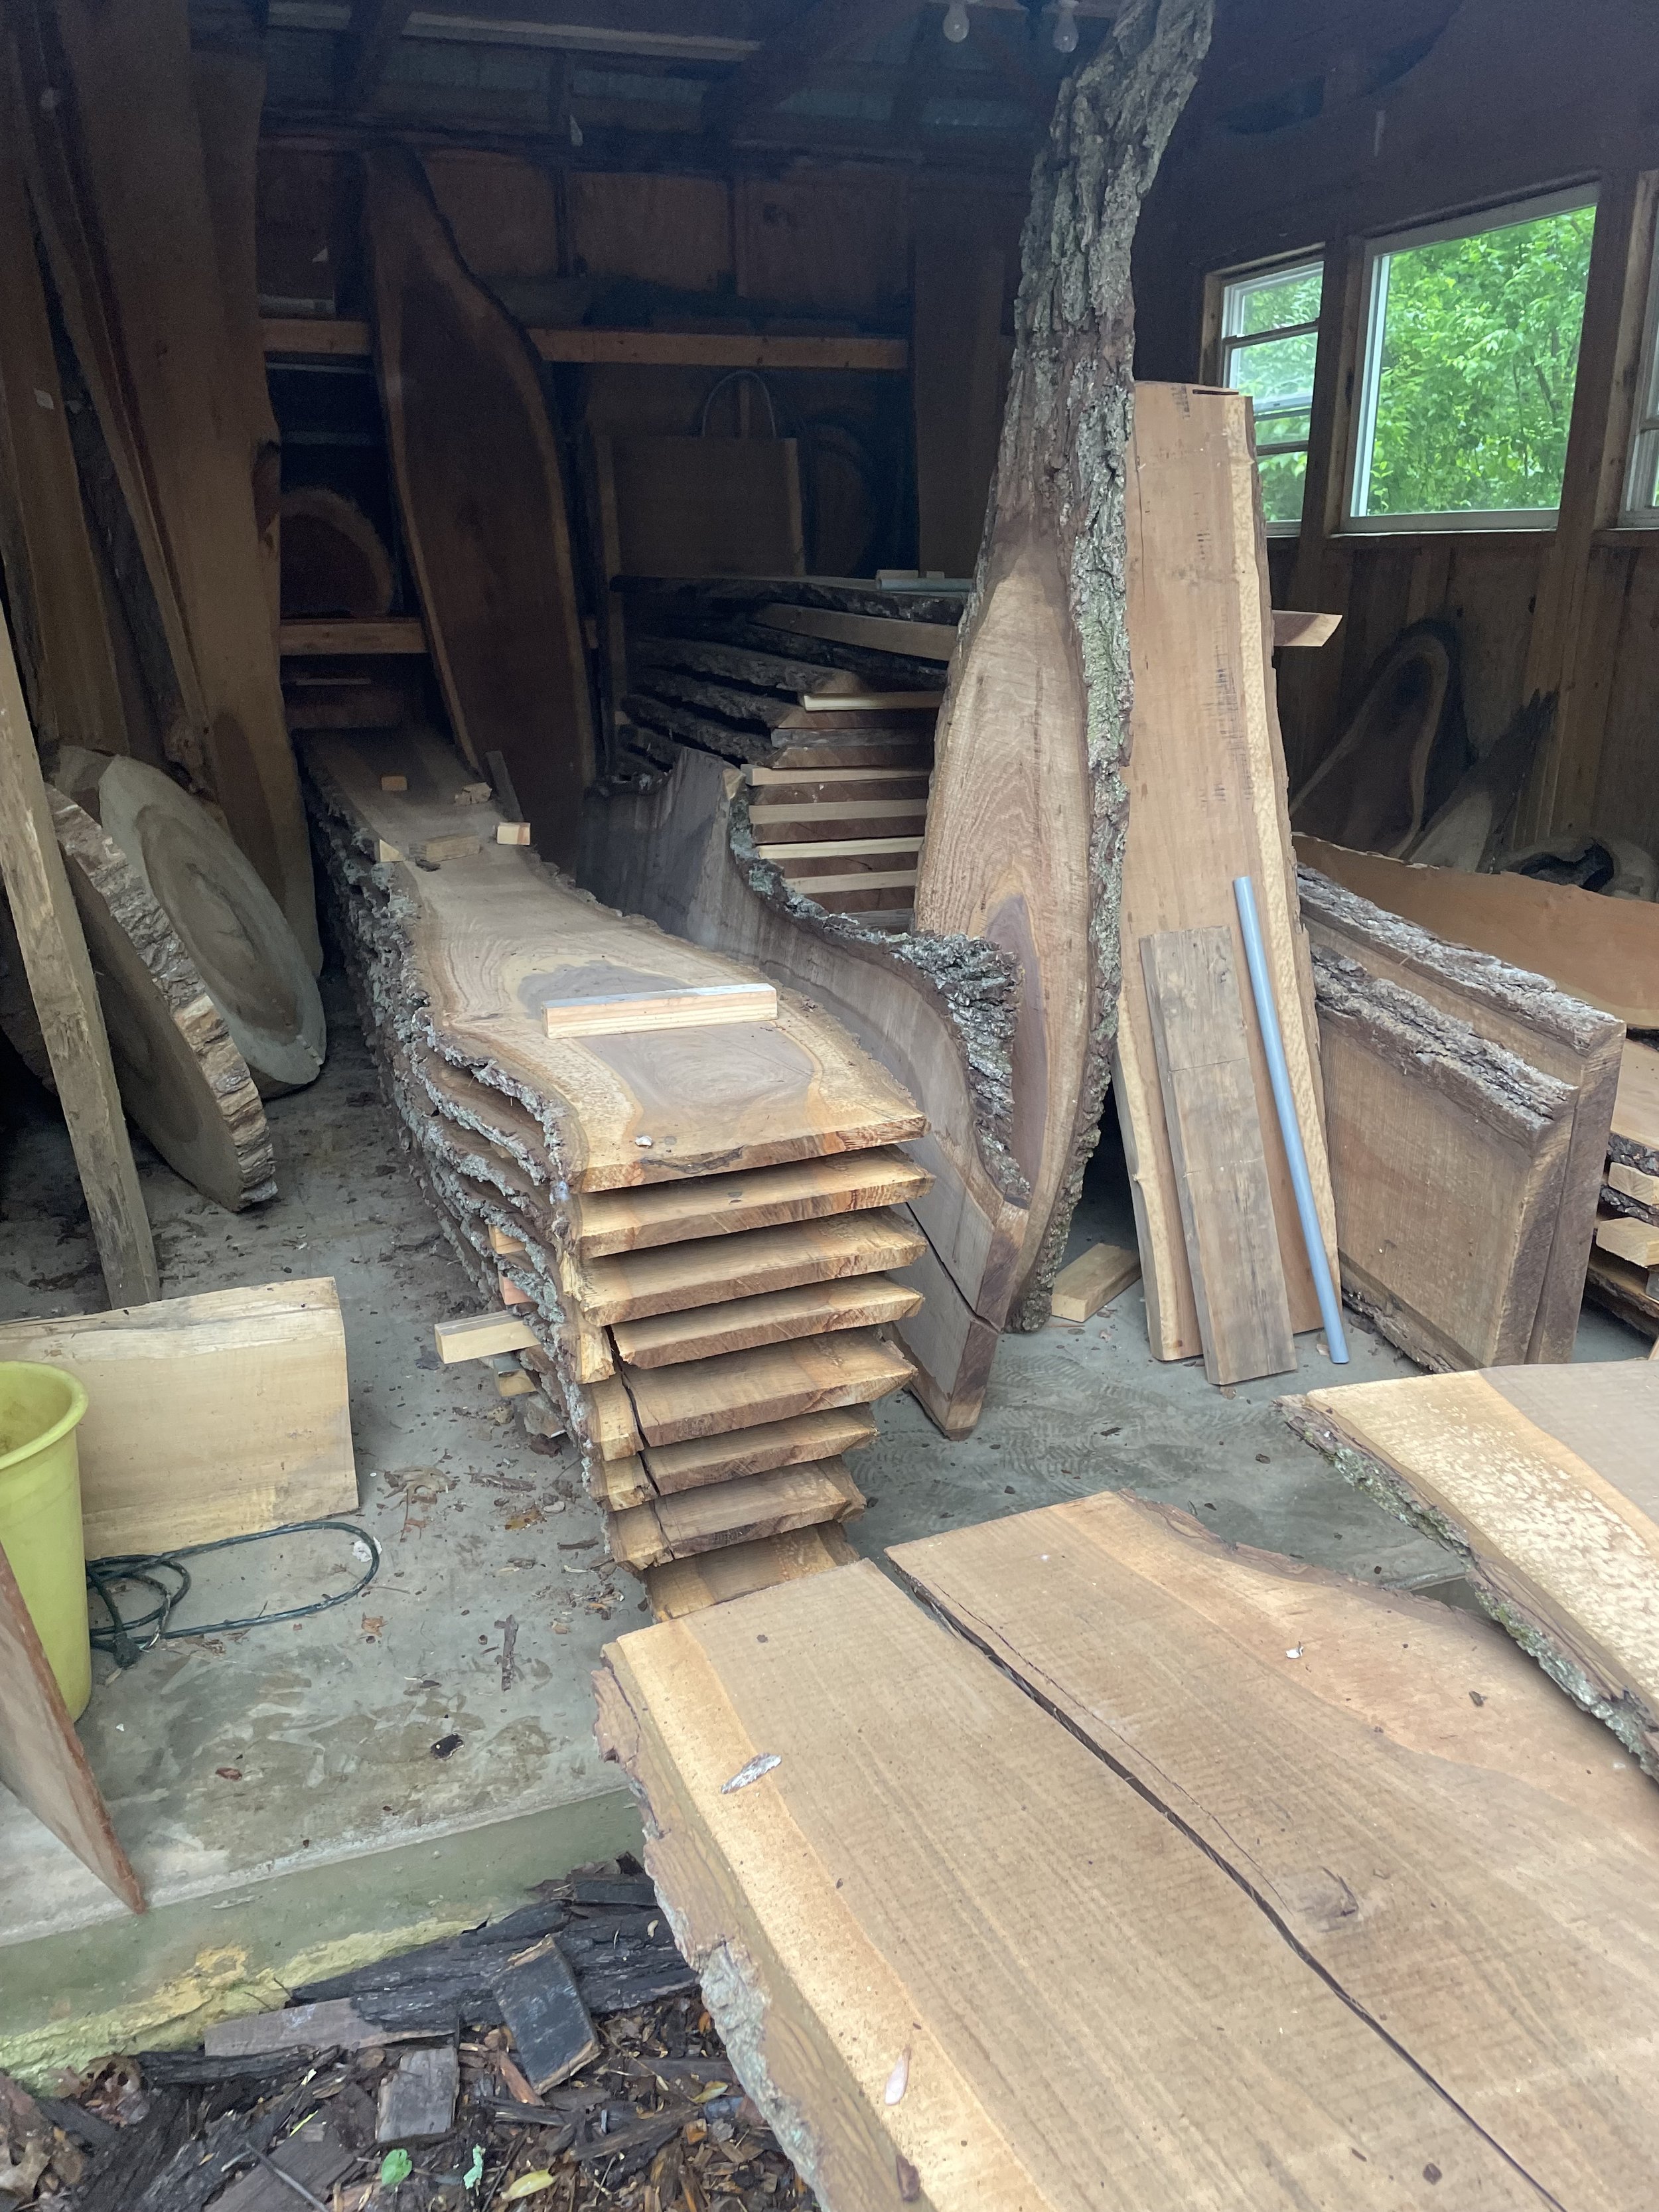
time to find the top pieces. i lucked out, and after many years of looking, came across the “lumber barn” all the way out river road. this guy cuts up fallen trees, has many different types of wood. i selected a few pieces of black walnut and some maple. he planed them down for me to 3/4” (to fit that little shelf on the inner wall that i screwed up before and turned over to make work.) BEST place for wood in montgomery county.


cut and sand sand sand the new wood. also jigsawed the legs themselves to give the outer edges some curves. took a grinder to the 4”x4” for some interesting designs, then stained the pine (legs and middle beam). looked too dark, so i added some light green tint to non-colored water-based polyurethane and brushed over it all.
figured out how to raise one of the top boards from underneath (so you don’t have to crowbar it every time we want to take the top off). i cut a hole in the bottom puzzle board and devised a peg-push-up thing.
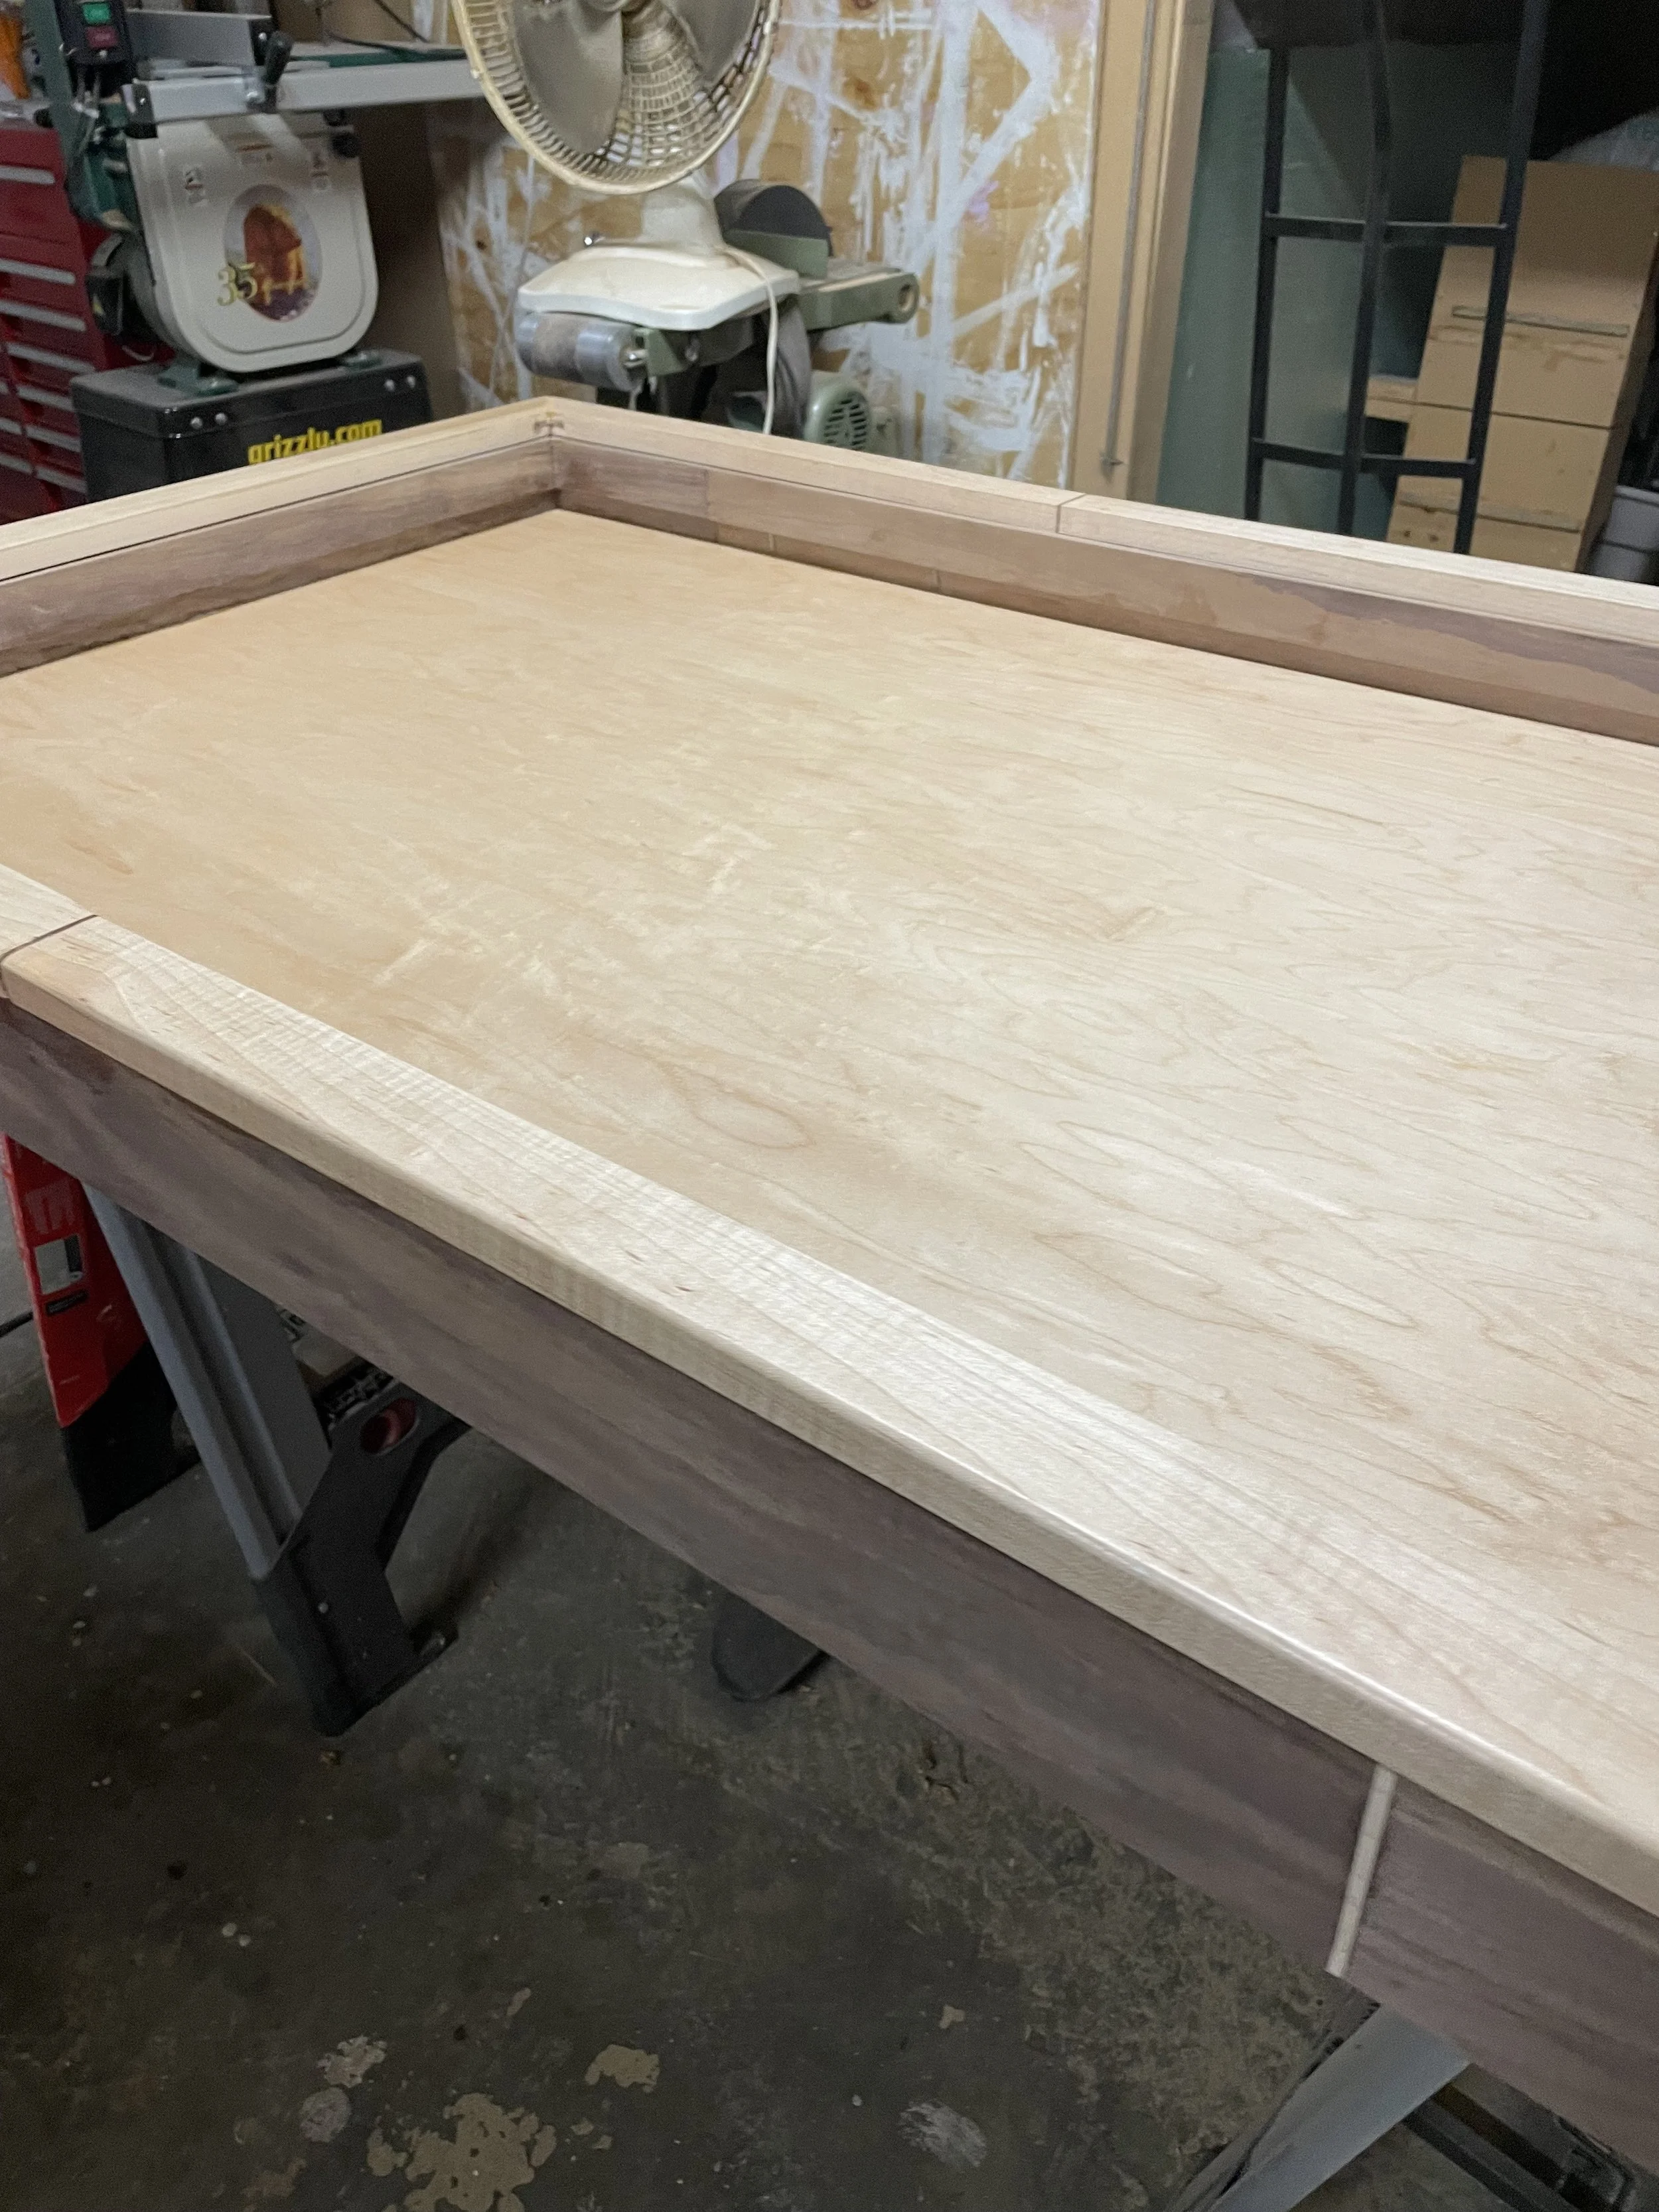
finally polished the walnut parts with two coats of Osmo Polyx (urethane with wax, protects and brings out the walnut shades — see the difference between the two pieces in the third pic below), light sanding after each coat. used the water-based poly for the pine and maple.


brought it all upstairs, moved out the old table, and put it together. the warp on the 4”x 4” pushed everything out of whack a bit, but finally muscled it all into place.


some screw ups — thought the height would work, but because of the 3 1/2” walnut case, leg room clearance got screwed up. so i’m adding wood to the leg base. also would have used thicker wood to attach legs but because i used a 1/2” board, i could only use 1” nails. lessons learned.
anyway, that’s it! used many new (to me) techniques, and learned a lot. this was super fun to make. next….